What is GitHub Actions?
GitHub Actions is a continuous integration and continuous delivery (CI/CD) platform that allows you to automate your build, test, and deployment pipeline. You can create workflows that build and test every pull request to your repository, or deploy merged pull requests to production.
You can find more info about it here.
Why integration tests are important?
Unit tests and Widget tests are handy for testing individual classes, functions, or widgets. However, they generally don’t test how individual pieces work together as a whole, or capture the performance of an application running on a real device. These tasks are performed with integration tests.
Integration tests are written using the integration_test package, provided by the Flutter SDK.
How to write integration tests?
Assuming you have already created a Flutter project with the integration_test package added as a dependency. You can take a look at the integration testing documentation to learn how to write integration tests.
For example, a simple integration test would look like this:
import 'package:flutter_test/flutter_test.dart';
import 'package:integration_test/integration_test.dart';
import 'package:my_app/constants.dart';

import 'package:my_app/main.dart' as app;

final String searchQuery = 'example query';

void main() {
  IntegrationTestWidgetsFlutterBinding.ensureInitialized();

  group('search test', () {
    testWidgets('search & tap on the first result', (tester) async {
      app.main();
      await tester.pumpAndSettle();

      // [Keys] is a seperate class that contains a list
      // of all the keys associated with the widgets in the widget tree.
      final Finder searchBar = find.byKey(Keys.searchBarKey);
      await tester.tap(searchBar);

      // Enters the search query into the search bar.
      await tester.enterText(searchBar, searchQuery);

      // Sends a signal to the system that the text action is complete.
      await tester.testTextInput.receiveAction(TextInputAction.done);
      await tester.pumpAndSettle();

      final Finder results = find.byKey(Keys.resultsKey);

      // Taps on the first result from the search results.
      await tester.tap(results.first);
      await tester.pumpAndSettle();
    });
  });
}
Workflow Overview
Here is a quick overview of the steps involved in the workflow we are going to create:
Setting up GitHub actions
First of all, you need to create a workflows folder inside the .github folder.
Then, you need to create a testing.yml file inside the workflows folder. This file contains the configuration for our integration tests.
Your folder structure should look like this:
project-folder/
├── .github/
│   └── workflows/
│       └── testing.yml
Now, it's time to setup the basic workflow:
name: Run integration tests
on: push
jobs:
integration-tests:
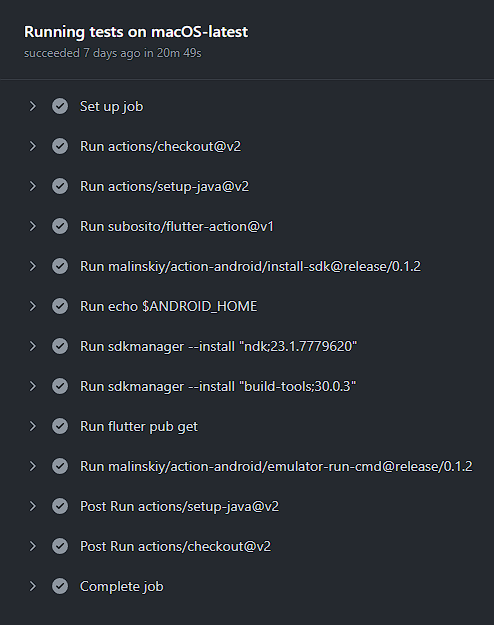
name: Running tests on macOS-latest
runs-on: macOS-latest
strategy:
fail-fast: false
steps:
- name: Checkout code
uses: actions/checkout@v2
This job is triggered when you push new changes on the default branch. The first step that we will use is to checkout the code of our branch at the particular commit.
Setting up Flutter and Android
First thing we need to do is to setup Java in our workflow, we can easily do it using setup-java provided by GitHub.
We will be using Java 11 with Zulu as distribution channel:
- name: Setup Java
  uses: actions/setup-java@v2
  with:
    distribution: 'zulu'
    java-version: '11'
Now, we need to setup Flutter in our workflow. We can easily do it by using another action provided by subosito with stable channel as the default:
- name: Setup Flutter (stable)
  uses: subosito/flutter-action@v2
  with:
    channel: 'stable'
Also, we need setup an emulator for our tests. We can setup the sdk using malinsky/action-android:
- name: Install Android SDK
  uses: malinskiy/action-android/install-sdk@release/0.1.2
- run: echo $ANDROID_HOME
- run: sdkmanager --install "ndk;23.1.7779620"
- run: sdkmanager --install "build-tools;30.0.3"
ndk is not necessary for our tests, it is just shown as an example of what I use in production. You can install specific version of components you require just like that.
Running the tests
We need to first get all the packages that we need to run our tests. We can do it by using the command in the workflow:
- run: flutter pub get
Finally, we can run our tests while the emulator is running using the following action:
- uses: malinskiy/action-android/emulator-run-cmd@release/0.1.2
  with:
    cmd: flutter test integration_test
    api: 31
    cmdOptions: -no-snapshot-save -noaudio -no-boot-anim -cores 2 -memory 3072 -no-window
    tag: google_apis
    abi: x86_64
cmd is the command for running the tests and api is the API level of the emulator.
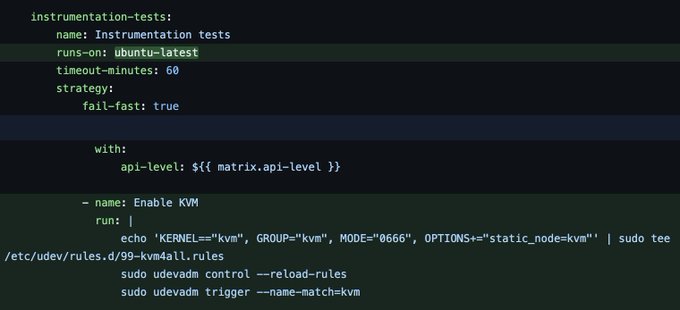
Update: We can also use KVM now to speed up the emulator.
TIL the new Github Actions ubuntu-latest images support KVM and can run Android emulator tests faster than macOS-latest. They're free for public repos. Pretty awesome!
Final Workflow
The final testing.yml workflow should look something like this:
name: Run integration tests
on: push

jobs:
  integration-tests:
    name: Running tests on macOS-latest
    runs-on: macOS-latest
    strategy:
      fail-fast: false
    steps:
      - name: Checkout code
        uses: actions/checkout@v2
      - name: Setup Java
        uses: actions/setup-java@v2
        with:
          distribution: 'zulu'
          java-version: '11'
      - name: Setup Flutter (stable)
        uses: subosito/flutter-action@v2
        with:
          channel: 'stable'
      - name: Install Android SDK
        uses: malinskiy/action-android/install-sdk@release/0.1.2
      - run: echo $ANDROID_HOME
      - run: sdkmanager --install "ndk;23.1.7779620"
      - run: sdkmanager --install "build-tools;30.0.3"
      - run: flutter pub get
      - uses: malinskiy/action-android/emulator-run-cmd@release/0.1.2
        with:
          cmd: flutter test integration_test
          api: 31
          cmdOptions: -no-snapshot-save -noaudio -no-boot-anim -cores 2 -memory 3072 -no-window
          tag: google_apis
          abi: x86_64
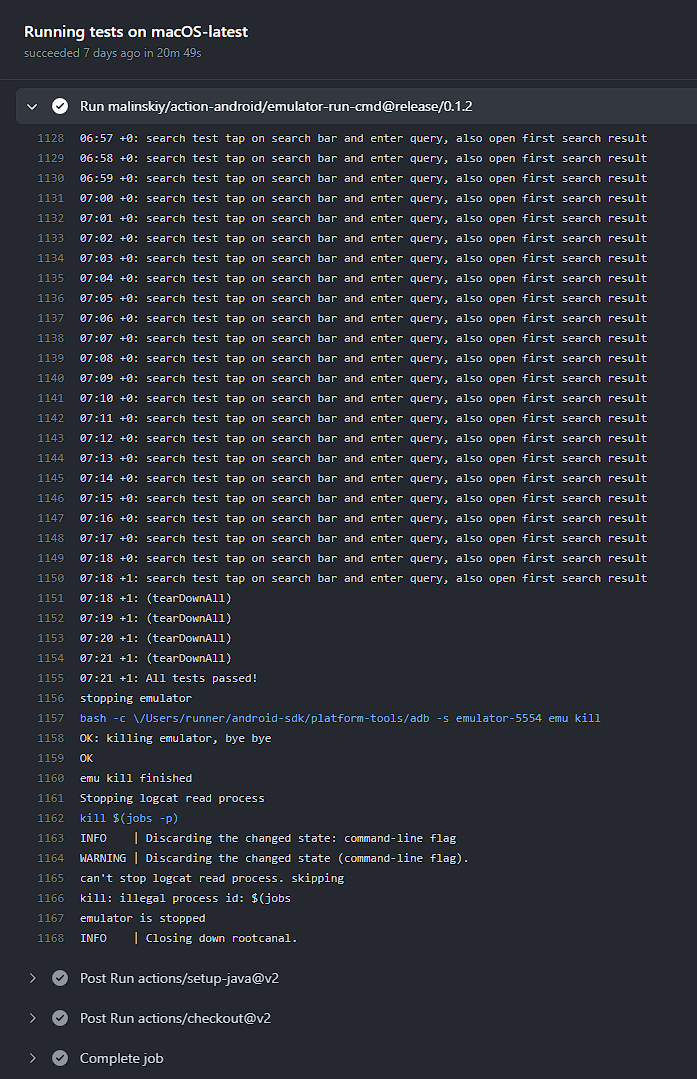
And here is the workflow in action:
Final Words
Testing can be a bit of a challenge, but it's worth it. Once you start writing some tests you can start to see how you can improve your code and app workflow.
I hope this helped you to get started with testing in Flutter and how to use GitHub Actions to automate your tests. Share it with others if you found it helpful.