In my daily workflow, I mainly work within a Unix-like environment and I fiddle with the command line a lot. I also use Windows as my primary OS and I have to switch between the two environments quite often. This is a problem because I have to install all my tools on both the environments and keep them up to date.
The motive of this post is to document my journey from a standard WSL installation to a reproducible development environment using Nix.
Why Nix?
I discovered Nix a few months ago through a friend and was amazed by the concept of reproducible development environments. I have a lot of tools that I use on a daily basis and I have to install them on every machine I use.
Until a better, more official solution comes along I've just been running Nix with Home Manager on top of a standard Ubuntu WSL installation.
Pre-requisites
A working WSL installation. I'm using Ubuntu 22.04 LTS at the time of writing this.
Now that we have that out of the way, let's get started!
Installing Nix
The installation process is pretty straightforward. Just run the following command in your terminal:
sh <(curl -L https://nixos.org/nix/install) --daemon
The above command is using the multi-user installation with systemd support in WSL. This helps it to automatically start the Nix daemon on startup or relogin.
You should be able to run the nix command now. If not, try restarting your terminal.
nix --version
You should see something like this:
nix (Nix) 2.15.0
Installing Home Manager
Home Manager is a tool that manages the user environment of Nix. It allows you to install packages, manage dotfiles, etc in a declarative manner.
To install Home Manager, run the following commands:
# I am using the unstable channel because I want the latest features
nix-channel --add https://github.com/nix-community/home-manager/archive/master.tar.gz home-manager
nix-channel --update
With that out of the way, we can configure some experimental features of Nix. In our case, we want to enable nix-command and flakes in our configuration file.
nix = {
  package = pkgs.nixFlakes;
  extraOptions = ''
    experimental-features = nix-command flakes
  '';
};
Now, we need to generate the Home Manager configuration file.
After the initial activation has completed successfully then building and activating your flake-based configuration is as simple as running home-manager switch.
# This will generate a flake.nix and a home.nix file in ~/.config/home-manager
nix --extra-experimental-features nix-command --extra-experimental-features flakes run home-manager/master -- init --switch
Adding programs and packages
Now that we have Home Manager installed, we can start installing our programs and packages.
To install packages, we need to add them to the home.packages list in our configuration file.
{
  home.packages = with pkgs; [
    # Any package available on Nixpkgs
    btop
    fd
    ripgrep
  ];
}
To configure programs, we need to add them to the programs list in our configuration file.
For example, we will be checking out the starship configuration options which are defined in the starship.nix file.
programs = {
  starship = {
    # enable the module
    enable = true;
    enableBashIntegration = true;
    # some other configuration options
    settings = {
      add_newline = true;
      command_timeout = 10000;

      cmd_duration = {
        min_time = 0;
      };

      hostname = {
        disabled = false;
        ssh_only = false;
        format = " at [$hostname](bold red) in ";
      };

      username = {
        show_always = true;
        format = "[$user]($style)";
      };
    };
  };
};
Configuring our Flake
Now that we have our configuration file ready, we need to configure our flake to use the configuration file we just created. Below is a modified and easy to use version of my flake.nix file.
{
  description = "Home Manager configuration for WSL";

  inputs = {
    nixpkgs.url = "github:nixos/nixpkgs/nixos-unstable";
    home-manager = {
      url = "github:nix-community/home-manager";
      inputs.nixpkgs.follows = "nixpkgs";
    };
  };

  outputs = {
    nixpkgs,
    home-manager,
    devenv,
    ...
  }: let
    config = {
      allowUnfree = true;
    };
  in {
    # The name is `wsl` because I have it changed, it can be anything you want and
    # it will be your `username` by default
    homeConfigurations.wsl = home-manager.lib.homeManagerConfiguration {
      pkgs = import nixpkgs {
        inherit config;

        # This is required to make sure that the packages are installed in the correct architecture
        system = "x86_64-linux";
      };

      # This is the path to our configuration file which we generated earlier
      modules = [./home.nix];
    };
  };
}
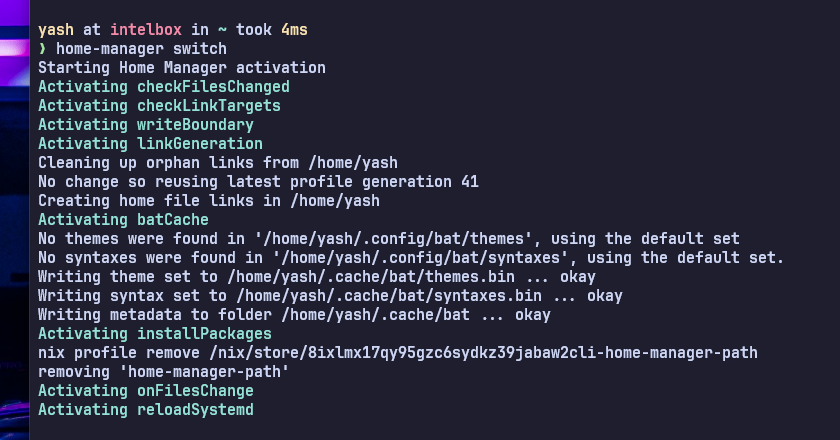
Now, we can run home-manager --extra-experimental-features nix-command --extra-experimental-features flakes switch to apply our configuration and it will install all the packages and programs we have defined in our configuration file with the options specified. A shell restart may be required to see the changes.
You should see something like below after running the command.
My complete wsl/config.nix can be found here as a reference / starting point.
Conclusion
After going through all this, you should now have a working Nix on WSL environment ready for you to start playing around with. Following this guide, pretty much everything is managed by Nix in combination with home-manager which helps me to replicate my development environment on any machine I want.
Hopefully this journey was as fun for you as it was for me. If you have any questions or suggestions, feel free to reach out to me on Twitter. Thanks for reading!